Wednesday, October 6, 2010

Clearance Sale

From October 5–18, we’re adding over two hundred more discontinued items--some at up to 80 percent off--to our Clearance Rack.
Things to know about the Clearance Rack Blitz:

  • Orders for Clearance Rack items can be placed  Online by clicking on the button at the left of your screen or through me personally.
  • Qualifying orders are eligible for hostess benefits/Stampin’ Rewards.
  • While the Blitz lasts from October 5–18, some items, depending on availability, may be made available in the Clearance Rack in the future.
  • All discontinued items are available only while supplies last.
  • All sales of discontinued items are final.

Let  me know if you need any help. (Thanks Angie!)

(-: ¸.·´* .·´*¨¨)) -:¦:- ***
((¸¸.·´*~Kathy.·´*)****¨¨))
-:¦:- ·· ((¸¸.·´* .·´*((¸¸.·.·´ *-:¦:- ... :-)

Monday, October 4, 2010

Angela’s Crop

I’m not a scrapper, but I was invited to a crop by Tange to demonstrate my Big Shot and do a make and take. Angela’s house in Summerfield is huge and to die for! It is called White Rose Plantation and has its own website here. {Just to make sure, ya'll do know that when I type "here" and it is in a different color, that is a live link, right?} You can see how this great house was constructed and how it looks today! Lots of room for 10+ scrappers to spread out between the dining room, foyer and living room. Here’s a few pics I took before

Before with Gale

and during the crop. Click on any pic to see it bigger.

During 2

Gale during

Yep, that’s Gale! Kelly had this nifty drink holder, trash container. Gotta find me one of these!

Kelly's nifty tool

This is Terry’s little boy. I never caught his name, but he wore the cutest little bib during lunch – a camo print with “Major Trouble” on the front. Love it! He was no trouble at all, talking to and entertaining himself with a bag of Cheetos and his toys. He zonked out for a nap after lunch!

Terry's boy

This is the little 6 x 6 make and take page I put together using printed letters which I fussy cut and colored and the four leaf shapes that come on the Leaves 2 Bigz die for the Big Shot. I sponged the edges of the leaves, curled the tips over a bone folder and drew veins on with a Versamark pen.

Fall page

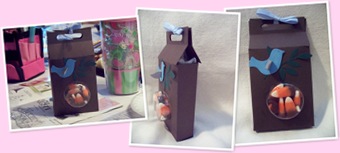
I made some drawing prizes for this workshop and another I am doing later this month. This little candy bar holder can be found on Angie Juda’s Chic ‘n Scratch blog here. {This is another live link!} Look at her Sept. 29 post. Today, Oct. 4, she posted her video tutorial on how to make these. Prizes

I made a belly band with the Haunting Wheel and wrapped it around a film-strip punched orange layer. The two ladies who won them were really happy.

Angela’s Dad made lasagna as our main course at lunch and everyone else brought yummy dishes, appetizers, salads. I brought dessert and everyone wanted the recipe. I’ve had this recipe for almost 30 years, given to me by my sister from Minnesota. Whenever any of her friends bring this dessert to a potluck, someone would say, “OMG, you brought Redford!” I told the ladies at Angela’s I would put the recipe here:

The Next Best Thing to Robert Redford

First layer:

1 Cup Flour

1 Cup finely chopped pecans

½ Cup butter, melted

Mix flour, butter and pecans till crumb like. Press into bottom of 9” x 13” pan and bake 25 minutes at 325 degrees until golden brown. Cool.

Second layer:

1 8 oz. package of cream cheese, softened

1 Cup powdered sugar

½ of an 8 oz. container of Cool Whip (I used light as if that would make this less fattening! LOL)

Beat well and spread over cooled crust

Third layer:

1 large package of chocolate pudding (butterscotch, banana cream and lemon also work great)

1 large package of vanilla pudding

4 Cups cold milk

¼ Cup powdered sugar

1 tsp. vanilla

Mix until smooth and thickened. Spread over cream cheese layer

Fourth layer:

Spread last half of Cool Whip over pudding layer. Sprinkle with grated chocolate bar. Refrigerate until chilled.

Thanks for stopping by. Comments always welcome!

(-: ¸.·´* .·´*¨¨)) -:¦:- ***
((¸¸.·´*~Kathy.·´*)****¨¨))
-:¦:- ·· ((¸¸.·´* .·´*((¸¸.·.·´ *-:¦:- ... :-)

Tuesday, September 14, 2010

Creative Images September Meeting

We had a good turnout last night, especially with two returning members.  Welcome back Janice and Theresa!  We took care of business and exchanged our cards - “Pet Friendly” was the September theme.  Holly did the project of a marvelous little plaque.  First up, pet cards.

Lona did this first card with a watercolored puppy and gold paper hole reinforcements masquerading as eyelets, although she has some of those on there, too. 

Lona's Puppy

Next is my black and red card featuring a Pekinese (with no “g” in it!) with his bone which is almost as big as he is. 

Kathy's Pekingnese 

Holly’s little fussy cut terrier is so cute!  She even added red to the flowers and I think she did Crystal Effects on one of the butterflies.

Holly's Terrier

Therese did a great job coloring this cute doggie being towed in the wagon. 

Therese's wagon

Tange tried to convince me that people have spiders for pets!  He does have a lovely “web” and pretty green eyes.

Tange's spider

Linda made this bright, glittery fishy card.  Love the fishy brads.

Linda's fishies

Ella made this card with a die cut doggie and bone.  I still have paw prints all over my heart from my little Lady.

Ella's diecut puppy

I was present at the birth of Pam’s little doghouse.  She made the doggie using punches and her husband decreed that his name should be French.

Pam's doghouse

Connie made this pretty fussy cut birdie in a die cut tree and layered with designer papers.

Connie's birdie

Here’s where Theresa’s “Just Because You’re You” card goes, but picture didn’t turn out.  Sorry.

Jeannie made this card with two cats that are definitely “children in fur coats.”  

Jeannie's cat faces

Janice’s computer room is full of Mickey Mouse collectibles, so she had plenty of inspiration for this happy card.  Love the way she layered two Modern Label punches and constructed little jeweled Mickey’s!

Janice's Mickey

Holly did the project this month, a little chipboard plaque with buttons, antique-looking photos and a cool saying.  Here’s her sample.  I’m sticking a magnet on the back of mine and putting it on the fridge.

Holly's project sample

In order, the following finished projects were made by Connie, me, Janice and Linda.

Not everyone gave me their project to take pictures of, but here’s the last three, made by Lona, Theresa and Pam.

That’s it for this month.  Next month’s theme will be “Thinking of You,” and we’ll have an “Old World” ATC swap for those interested.

Thanks for stopping by.  Comments always welcome!

(-: ¸.·´* .·´*¨¨)) -:¦:- ***
((¸¸.·´*~Kathy.·´*)****¨¨))
-:¦:- ·· ((¸¸.·´* .·´*((¸¸.·.·´ *-:¦:- ... :-)

Monday, September 13, 2010

Theresa’s Workshop

Yesterday, Theresa hosted another great workshop and earned or bought everything on her wish list!  She was a very happy camper!  As always, you can click on a picture to enlarge it.

First, here I am demonstrating watercoloring standing up!  I showed how to color with reinkers and markers.

Watercoloring demo

Then I showed how to stamp on candles.  Actually, you stamp on tissue paper, color the image, tear it out and apply it to a candle with waxed paper and a heat gun.  Jenni Mouer did a great tutorial on this years ago on Splitcoaststampers and they have since added a video to it here.  Pam took some pics of me as I demonstrated this cool technique.

It’s always a WOW moment when the image starts to melt into the candle and the colors pop!  Janice won this candle in a prize drawing.  I gave a completed candle project to Theresa as a hostess gift. 

Theresa's candle 

Connie, Pam and Linda had a good time!  Look at that cheese and fruit tray! 

Ladies at table 1

Janice, Theresa and Eleanor loved their make and takes.

Ladies at table 2

We made a lovely black and white Christmas card with Scenic Season and a super easy one-layer card with Elements of Style.

Scenic Season

Elements of Style 1 layer

I had two other drawing prizes, a little birdhouse and the little purse we made at Holly’s workshop.  Details on the purse are in the August 22, 2010, post below.

Beautiful Wings 

Here’s the birdhouse, modified from a box here. 

I got the idea to make it into a birdhouse with sweet treat cups from Valita at her August 16, 2010, post here. 

I think that covers everything and gives credit where credit is due.  Thanks for stopping by.  Comments always welcome!

(-: ¸.·´* .·´*¨¨)) -:¦:- ***
((¸¸.·´*~Kathy.·´*)****¨¨))
-:¦:- ·· ((¸¸.·´* .·´*((¸¸.·.·´ *-:¦:- ... :-)

Links for Magnolias and Roses

I have posted this picture of rose/magnolia flowers on top of boxes made with Top Notes a couple of times . . .

Magnolia & Rose boxes

. . ., but it looks like I never provided a link to the video tutorials in this blog.  Probably because I was going to show how to make these at a workshop, which I did and then I forgot to post a link.  These are gorgeous, but very easy, flowers made from SU's ornament punch.  There are several videos on youtube, but this one by The Scrappin Mama is for the magnolia with glossy cardstock:   here.  Here's another one, by yoyostamps, slightly different on how to make a rose with regular cardstock:  here.  I learned something from both videos.

After I made a few of these, I determined that I wanted the green leaves on the bottom to stick out further from the base of the flower rather than just being the bottom layer of petals, so I modified the base just a bit with little extenders cut from scraps.  If you watch the videos, you will see that this makes sense.  This extends the leaves out from the base about a quarter of an inch.

Magnolia & Rose leaves

All of the glue and strips are totally hidden once you glue this to the bottom of the rose or magnolia.  These leaves are curved down and the petals of the flowers curve up.

I also assembled my flowers with fast-drying tacky glue instead of glue dots or double-stick tape.

I’m working on a post for Theresa’s workshop and tonight is my stamp club meeting, so more later!

That’s it for now. Comments always welcome.

(-: ¸.·´* .·´*¨¨)) -:¦:- ***
((¸¸.·´*~Kathy.·´*)****¨¨))
-:¦:- ·· ((¸¸.·´* .·´*((¸¸.·.·´ *-:¦:- ... :-)

Sunday, August 22, 2010

Holly’s Workshop

It’s been a week since Holly’s workshop and everyone already has their orders!  Holly qualified for an upgrade to three day shipping and Stampin’ Up had the order boxed and ready to go the day I uploaded it, Tuesday.  Wow!  Debated whether to post pics of our three make and takes, but since we’ll be doing something different at my next workshop, here they are. 

First, we made this Fast and Fabulous card with the hostess set of the same name!  Used the lattice embossing folder, new Daffodil Delight and Very Vanilla cardstock, Very Vanilla satin ribbon and Daffodil Delight and More Mustard inks. 

Fast and Fabulous 4

Next we made this flutter card with Butterfly Prints (this sample used butterfly from Punched Posies.  Colors were Pacific Point and Baja Breeze.

Punched Posies

We had time for one more little quickie, this little purse made with a design from Angie Juda at her blog  here  on her Aug. 9, post.  She even did a video on Aug. 11 here.   Her box was for Halloween, but I used the Beautiful Wings Embosslit to make mine.  If you sign up for her newsletter, you will get her 12 weeks of Halloween projects.  I love Angie’s stuff and she is so generous with her videos.

Beautiful Wings

Next up, Theresa’s workshop where we will be making a Christmas card, among other things.  Holiday Mini will be in effect then and we’ll play with some pretty new stuff. 

That’s it for now. Comments always welcome.

(-: ¸.·´* .·´*¨¨)) -:¦:- ***
((¸¸.·´*~Kathy.·´*)****¨¨))
-:¦:- ·· ((¸¸.·´* .·´*((¸¸.·.·´ *-:¦:- ... :-)

Tuesday, August 10, 2010

August Meeting of Creative Images


There were ten of us at last night’s meeting and boy will the ones not there be sorry. Linda and Ursula did the project and despite repeated requests that Linda ask for reimbursement, she wouldn’t take anything but thanks. So, thanks, Linda, for the great project. More on that later.


“Scenery” was the theme for the exchange card this month. First up, is Holly’s birch forest, up close. Reminds me of something Bev Doolittle would paint. I had Holly write down how she did this. Lots of layers, white paint, daubing, etc. She braided twine and stapled it on the edge. If you want details, e-mail me. As always, right click on a picture for details.


Holly's green woods


Eleanor did this lovely scene with lots of fussy cutting and popping up with up stuff, my favorite. Love the golden lab crossing the bridge.


Ella's bridge


Therese did this Adirondack chair out by the lake, also with fussy cuts popped up. Love the ribbon inserted into the frame.


Therese's adirondack chair


Lona did this moon over snowy trees, punched out and popped up. The heat must be finally getting to her if she did snow!


Lona's snowy trees


More snowy trees in the midst of our heat wave. Rosie did these lovely fir trees.


Rosie's snowy trees


Here’s my three wolves, fussy cut and popped up, what else?


Kathy's wolves


Here’s Linda’s first sample of her project. She brought everything needed to make these lovely gift jars of cookie mix. She gave us the stamped images to color our choice, the bowl of apples or the happy chef.


Linda's Sample 2 Linda's sample 1


Not only did she bring the jars and the embellishments, she brought the ingredients for the applesauce cookies, all mixed up and ready to layer the dry ingredients of flour with spices, raisins and chopped nuts! Only thing that won’t go in the jar is the little container of applesauce, which she also provided. Wow! It was such a cute idea, I grabbed three extra for members who were out of town. All I need now is some cooler temps (see the snowy cards above) so I can actually turn on the oven to bake these cookies. When I finish coloring mine, I will assemble the layers and post a pic here. It’s a great thank you gift, hostess gift, whatever gift. Thanks again, Linda!

By request, edited to add Linda's recipe!


That’s it for now. Comments always welcome.


(-: ¸.·´* .·´*¨¨)) -:¦:- ***
((¸¸.·´*~Kathy.·´*)****¨¨))
-:¦:- ·· ((¸¸.·´* .·´*((¸¸.·.·´ *-:¦:- ... :-)