Monday, September 13, 2010

Links for Magnolias and Roses

I have posted this picture of rose/magnolia flowers on top of boxes made with Top Notes a couple of times . . .

Magnolia & Rose boxes

. . ., but it looks like I never provided a link to the video tutorials in this blog.  Probably because I was going to show how to make these at a workshop, which I did and then I forgot to post a link.  These are gorgeous, but very easy, flowers made from SU's ornament punch.  There are several videos on youtube, but this one by The Scrappin Mama is for the magnolia with glossy cardstock:   here.  Here's another one, by yoyostamps, slightly different on how to make a rose with regular cardstock:  here.  I learned something from both videos.

After I made a few of these, I determined that I wanted the green leaves on the bottom to stick out further from the base of the flower rather than just being the bottom layer of petals, so I modified the base just a bit with little extenders cut from scraps.  If you watch the videos, you will see that this makes sense.  This extends the leaves out from the base about a quarter of an inch.

Magnolia & Rose leaves

All of the glue and strips are totally hidden once you glue this to the bottom of the rose or magnolia.  These leaves are curved down and the petals of the flowers curve up.

I also assembled my flowers with fast-drying tacky glue instead of glue dots or double-stick tape.

I’m working on a post for Theresa’s workshop and tonight is my stamp club meeting, so more later!

That’s it for now. Comments always welcome.

(-: ¸.·´* .·´*¨¨)) -:¦:- ***
((¸¸.·´*~Kathy.·´*)****¨¨))
-:¦:- ·· ((¸¸.·´* .·´*((¸¸.·.·´ *-:¦:- ... :-)

Sunday, August 22, 2010

Holly’s Workshop

It’s been a week since Holly’s workshop and everyone already has their orders!  Holly qualified for an upgrade to three day shipping and Stampin’ Up had the order boxed and ready to go the day I uploaded it, Tuesday.  Wow!  Debated whether to post pics of our three make and takes, but since we’ll be doing something different at my next workshop, here they are. 

First, we made this Fast and Fabulous card with the hostess set of the same name!  Used the lattice embossing folder, new Daffodil Delight and Very Vanilla cardstock, Very Vanilla satin ribbon and Daffodil Delight and More Mustard inks. 

Fast and Fabulous 4

Next we made this flutter card with Butterfly Prints (this sample used butterfly from Punched Posies.  Colors were Pacific Point and Baja Breeze.

Punched Posies

We had time for one more little quickie, this little purse made with a design from Angie Juda at her blog  here  on her Aug. 9, post.  She even did a video on Aug. 11 here.   Her box was for Halloween, but I used the Beautiful Wings Embosslit to make mine.  If you sign up for her newsletter, you will get her 12 weeks of Halloween projects.  I love Angie’s stuff and she is so generous with her videos.

Beautiful Wings

Next up, Theresa’s workshop where we will be making a Christmas card, among other things.  Holiday Mini will be in effect then and we’ll play with some pretty new stuff. 

That’s it for now. Comments always welcome.

(-: ¸.·´* .·´*¨¨)) -:¦:- ***
((¸¸.·´*~Kathy.·´*)****¨¨))
-:¦:- ·· ((¸¸.·´* .·´*((¸¸.·.·´ *-:¦:- ... :-)

Tuesday, August 10, 2010

August Meeting of Creative Images


There were ten of us at last night’s meeting and boy will the ones not there be sorry. Linda and Ursula did the project and despite repeated requests that Linda ask for reimbursement, she wouldn’t take anything but thanks. So, thanks, Linda, for the great project. More on that later.


“Scenery” was the theme for the exchange card this month. First up, is Holly’s birch forest, up close. Reminds me of something Bev Doolittle would paint. I had Holly write down how she did this. Lots of layers, white paint, daubing, etc. She braided twine and stapled it on the edge. If you want details, e-mail me. As always, right click on a picture for details.


Holly's green woods


Eleanor did this lovely scene with lots of fussy cutting and popping up with up stuff, my favorite. Love the golden lab crossing the bridge.


Ella's bridge


Therese did this Adirondack chair out by the lake, also with fussy cuts popped up. Love the ribbon inserted into the frame.


Therese's adirondack chair


Lona did this moon over snowy trees, punched out and popped up. The heat must be finally getting to her if she did snow!


Lona's snowy trees


More snowy trees in the midst of our heat wave. Rosie did these lovely fir trees.


Rosie's snowy trees


Here’s my three wolves, fussy cut and popped up, what else?


Kathy's wolves


Here’s Linda’s first sample of her project. She brought everything needed to make these lovely gift jars of cookie mix. She gave us the stamped images to color our choice, the bowl of apples or the happy chef.


Linda's Sample 2 Linda's sample 1


Not only did she bring the jars and the embellishments, she brought the ingredients for the applesauce cookies, all mixed up and ready to layer the dry ingredients of flour with spices, raisins and chopped nuts! Only thing that won’t go in the jar is the little container of applesauce, which she also provided. Wow! It was such a cute idea, I grabbed three extra for members who were out of town. All I need now is some cooler temps (see the snowy cards above) so I can actually turn on the oven to bake these cookies. When I finish coloring mine, I will assemble the layers and post a pic here. It’s a great thank you gift, hostess gift, whatever gift. Thanks again, Linda!

By request, edited to add Linda's recipe!


That’s it for now. Comments always welcome.


(-: ¸.·´* .·´*¨¨)) -:¦:- ***
((¸¸.·´*~Kathy.·´*)****¨¨))
-:¦:- ·· ((¸¸.·´* .·´*((¸¸.·.·´ *-:¦:- ... :-)

Sunday, July 18, 2010

Pam’s New Catty Workshop

Pam hosted a workshop for stuff from the new catty yesterday, but due to various family emergencies, etc., only 4 ladies could attend, including Pam.  Turned out well, anyway, and everyone liked what I demonstrated and our two make and takes.   Click on any pic to enlarge it for details.

I’ve shown this pic before, but I just love it, so will share it again.  I did all the prep work of punching, sponging, and curling the magnolia petals and demonstrated how to put the magnolia together.  Therese won the rose box in my door prize drawing.  I gave Pam the magnolia I started.

Magnolia & Rose boxes

When Pam and I went to Mt. Dora last week (see the Sandhill Cranes below), I had to take a pic of this gorgeous umbrella that was in a shop window. Butterfly umbrella

Using the brolly for inspiration, I made this sample card using the butterfly punch and Butterfly Prints stamp set.

Butterfly Prints 1

With that same butterfly punch, I made these pansy petals . . .

Pansy_petals

. . . from which I made this pansy card!  Might demo how to make these at Holly’s workshop next month.

Pansies

Then we put together this easel card using the pineapple motif from Friends Never Fade with the newly returned Baja Breeze and Pacific Point cardstocks.  The learning curve for the Scalloped Trim border and corner punches was pretty steep, but everyone ended up with the perfect frames.

Friends Never Fade easel 2

Because the easel card was kind of intense, the second make and take was this super easy one-layer card using a mat punched with the Scalloped trim border punch and a sponge.  The flowers are from Elements of Style and sentiment from Sincere Salutations.  This one uses Melon Mambo, but Pam’s guests got to play with the new In Colors.

Elements of Style 1 layer

That’s it for now. Comments always welcome.

(-: ¸.·´* .·´*¨¨)) -:¦:- ***
((¸¸.·´*~Kathy.·´*)****¨¨))
-:¦:- ·· ((¸¸.·´* .·´*((¸¸.·.·´ *-:¦:- ... :-)

Thursday, July 15, 2010

Gorgeous Sandhill Cranes!

Pam and I went on a road trip yesterday to Mt. Dora and Winter Park, getting good and lost, but the highlight of the day, besides finding the new Penzey’s spice store, was running, almost literally, into these two Sandhill Cranes. We were on a busy road after leaving my upline’s house in Mt. Dora and saw one crane on one side of the road and another on the other. Stopping traffic, they were, thankfully, and not getting their idiot selves hit by cars. I stopped and so did other cars. Once they were both on my side of the road, I pulled over to take these pics. As they were poking along, they went into a nice yard, so I pulled into the driveway to take these pics. A man working down by his garage was oblivious to us or the birds. Click on the pics to see details.

Sandhill Crane

Sandhill Cranes Sandhill Cranes 2

One of these days, I will make it up to Payne’s Prairie in the winter to see them gathered by the thousands. But until then, I will catch glimpses, hopefully with a camera in hand, of them wandering here and there. I have never seen just one Sandhill Crane, always a mated pair, sometimes several pairs.

For more info, you can go here.

That’s it for now. Comments always welcome.

(-: ¸.·´* .·´*¨¨)) -:¦:- ***
((¸¸.·´*~Kathy.·´*)****¨¨))
-:¦:- ·· ((¸¸.·´* .·´*((¸¸.·.·´ *-:¦:- ... :-)

Tuesday, July 13, 2010

July Creative Images Meeting

We had a great turnout last night, only missing a few, with one sickie and a couple from out of town.  Almost everyone brought thank you swaps and everyone brought an “Asian Flair” exchange card.  Everyone wore a name tag, too.  How will our treasury make any money that way?  Jeannie did the project, something interesting she learned last month at Stampfest in Orlando.  So, here’s the pics!  As always, click on the pic to enlarge it.

First up, the Asian Flair exchange cards, starting with mine, because I can.  Made this with SU’s retired Kind and Caring Thoughts and black magic.  Went wild with fussy cutting, too.  SU’s ornament punch made the vase.
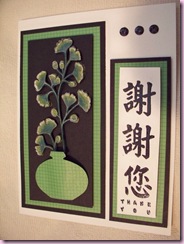
Kathy's Gingko 2

Next up, Tange’s gold, red and black fans, also fussy cut and popped up.  IRL, the brushed gold was stunning.

Tange's Fans

Therese made this gorgeous dragon with the alcohol ink marbleizing technique.  He was glossy, so photograph doesn’t do him justice.  I have to try this!  Had all the stuff forever.

Therese's Dragon

Pam made this lovely fan card, which could also be a fan window?  She crimped the fan pieces.  Whatever, it’s pretty.

Pam's Fan Window

Jeannie’s Asian Flair card is a crane, a Japanese good luck symbol.

Jeannie's Crane 

Eleanor made this pieced washi paper beauty.  Love the tiny crane in the corner.  IRL, it is a brushed silver background.
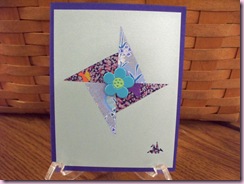
Ella's origami

Connie made this watercolored, fussy cut, popped up and Glimmer Misted “perfect pear.”  She put sequins in the middle of her flowers, too!

Connie's Pefect Pair

Holly made this lovely Geisha girl.  IRL, the greenish card base is brushed gold.  She is also Glimmer misted.  Can you tell Holly and Connie were playing together with Glimmer Mist?

 Holly's Gold Geisha

Lona made this lovely bamboo tag with Kanji.  Love the bamboo curtain behind the tag.

Lona's bamboo tag

That’s it for exchange cards.  Next, is Therese’s swap card, a nifty, Asian-inspired, mountain lake.

Therese's Mt. Scape swap

Tange’s swap cards were in a French mood, with merci as the background.

Tange's Merci swap

Pam’s swaps were black magic done with SU’s Awash With Flowers stamp set.  It’s much prettier IRL.
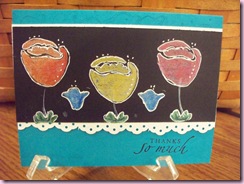
Pam's Black Magic swap

Here’s my black magic swap card, done with SU’s retired Kind and Caring Thoughts.

Kathy's thanks swap

We didn’t explain the rules to Connie about swaps, so she made hers all different.  I teased her so much, she won’t do that again!   All of these are also Glimmer Misted.


Holly made these lovely swap cards with a rose stamp, fussy cut and, you guessed it, Glimmer Mist!  I think the base card is brushed gold IRL.

Holly's Rose Swap

Lona’s swaps could be used as a night light!  That chartreuse is radioactive!  (Sorry, I couldn’t resist!)

Lona's nuclear swap

Next up, are samples from Jeannie’s project.  Although, this first one is just a show and tell of a card she made with the bear white embossed on vellum.  Jeannie has been collecting these Animal Spirits stamps for a while. Each image has multiple animals included in the design, with each one having a lady bug in there somewhere, a Native American symbol/totem for good luck, happiness and prosperity.
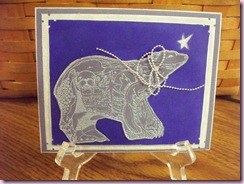
Jeannie's bear sample

Jeannie's Penguin sample Jeannie's dragonfly sample

These next pics are what we came up with, in varying stages of completion, using Jeannie’s technique of coloring, smooch spraying and antiquing (if we wanted).  I think the first dragonfly is Connie’s.
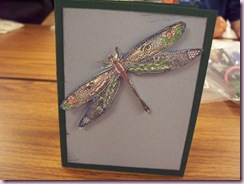
Connie's maybe

This one is Holly’s.  I can see this done with a vellum dragonfly so you can see the moon through the wings.

Holly's Dragonfly

I’ll be using this blue bear on a card for my BIL, who’s personal totem is the Bear.

Kathy's Bear

Lona is going to fussy cut and mount this dragonfly.  The smooch spritz is gold, not neon yellow!

Lona's gold butterfly

Pam made this dragonfly to finish another day.

Pam's Dragonfly

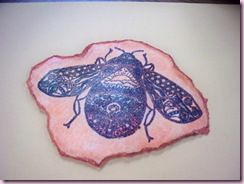
Therese started this bumble bee.

Therese's Bee

My little box for keeping our exchange spoons was getting boring, so I made another one.  Going to demo this magnolia at Pam’s workshop next Saturday.  Easy, but time consuming, with SU’s ornament punch.  It’s the prep work that is time consuming, punching, sponging and curling.  Actual assembly is a breeze.

Magnolia & Rose boxes

That’s it for now. Comments always welcome.

(-: ¸.·´* .·´*¨¨)) -:¦:- ***
((¸¸.·´*~Kathy.·´*)****¨¨))
-:¦:- ·· ((¸¸.·´* .·´*((¸¸.·.·´ *-:¦:- ... :-)